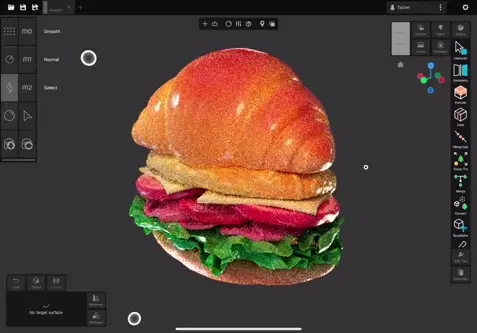
Prepare Uniform scenes for 3D Printing
Tools Used
All listed tools, procedural and overrides can be found in Uniform's gallery

Rebuild Surface Process

Surface Filter

Sharp Displacement Brush
This is how you can prepare a model for 3D printing using Uniform. After creating a model, your scene typically contains multiple disconnected meshes, instances, curves, and procedural objects. Before 3D printing, it is recommended to combine everything into a single, manifold mesh. In Uniform, you can complete the entire process within the same workspace file you are currently using.
First, set the scene you want to print as a scene source. Activate the scene source switch located at the top of the viewport. This will instruct Uniform to use this scene whenever a feature requires it, such as when creating instances or duplicates.
Next, open a new tab by clicking the plus icon. When a scene is pinned as a source, you can scroll down the preset list to find the “Scene Generator” presets. Select the “Scene Combined Mesh” preset. This will generate a copy of all the geometry from the previously pinned scene. You can now edit this copy as needed without affecting the original scene.
To prepare the object for 3D printing, set the desired detail size using the widget or the Detail Size tool and rebuild the mesh. This will create a single, manifold mesh suitable for printing.
You can then sculpt on the GeoMesh to accentuate or refine details for 3D printing. For example, you can emphasize edges using the Sharp Displacement brush or inflate thin surfaces with the Inflate deformer.
If you need real-world scale references during this process, you can enable the Plate overlay in the viewport settings panel. Open the panel and navigate to the Plate settings. Depending on your printer, you can select the dimensions and shape of the plate.
From the same panel, you can also adjust the real-world units of the viewport by modifying the World Unit Scale property.
Additionally, you can search the gallery for the Distance Measure tool to obtain information about lengths, angles, and volumes. By default, the tool measures distances, but you can access other modes by holding down M0 for Angle or M1 for Volume.
Finally, you can export the mesh using an exporter compatible with your slicer. Uniform supports exporting to formats commonly used in 3D printing, such as STL and 3MF. Open the viewport exporter panel, select STL, and use the button in the corner of the exporter to generate the file.
As an added tip, you can repeat this process without creating a new scene by opening the Add panel and selecting the “Scene Combined Mesh” preset from there. As long as the original scene containing the full model is marked as the source, this will create the combined mesh in the current viewport while preserving your shading, world units, and exporter settings.
More Tutorials
Create Stylized Hair using GeoCurve
Dynamic brush effects with Brush Overlay modules
Introduction to High Poly Sculpting
Getting started with Cloth Simulations
Introduction to SDF modelling with SolidVolume
Unlock more features with Global Overrides
Advanced Sculpting features overview
Asset Composition using Scene Instances
Using References to share colors and materials